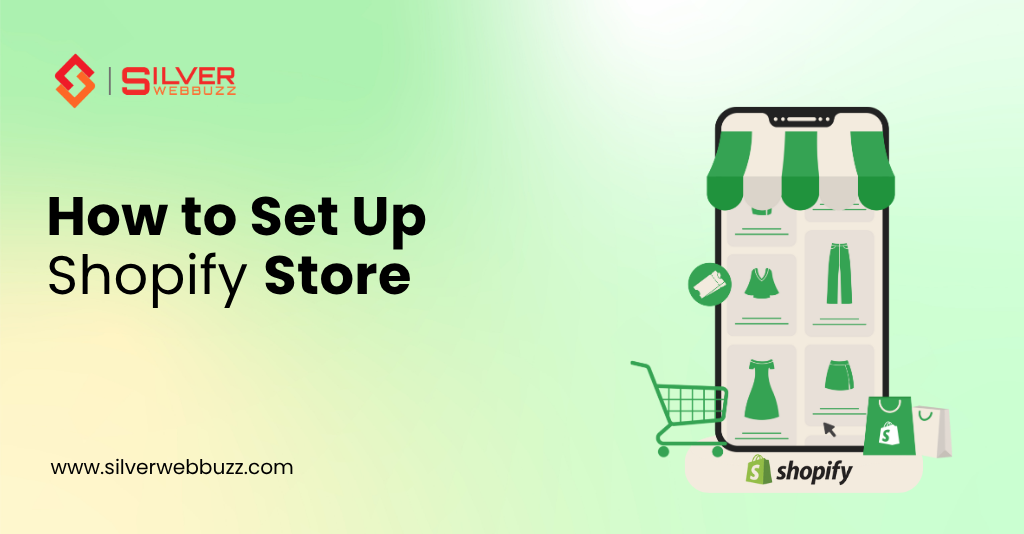
In the rapidly evolving world of e-commerce, launching an online store can seem like a monumental task. However, with the right platform and guidance, it’s more accessible than ever. This comprehensive guide will walk you through every step of setting up a Shopify store from the ground up in 2025, ensuring you have a professional, secure, and scalable online business. And in the fast-evolving world of eCommerce, Shopify has solidified its position as the leading platform for entrepreneurs, dropshippers, and growing brands worldwide. Supporting over 2.49 million merchants across 175 countries and powering approximately 4.6 million websites, Shopify’s global reach is unmatched. This widespread adoption speaks volumes about its reliability and versatility.
Why Shopify is the Go-To Platform for eCommerce in 2025
Shopify has solidified its position as a global leader in the e-commerce space, empowering millions of businesses in over 175 countries. Its popularity stems from a robust and reliable all-in-one commerce platform that caters to everyone from budding entrepreneurs and dropshippers to rapidly growing brands. The key benefits that make Shopify a preferred choice include its unparalleled scalability, robust security features, inherent mobile-responsiveness, and world-class customer support.
This guide is designed to be your ultimate companion in this journey, providing a detailed roadmap from the initial sign-up to the exciting moment of launching your very own Shopify store.
Key Takeaways
- Sign Up and Start for Free: You can begin your Shopify journey with a 3-day free trial, followed by a promotional offer for the first few months.
- Customization is Key: Shopify offers a wide range of free and premium themes that can be easily customized to match your brand’s identity without needing to write any code.
- Essential Pages and Products: Learn how to create fundamental pages like ‘About Us’ and ‘Contact Us,’ and efficiently add and categorize your products using Shopify’s intuitive interface.
- Payments, Taxes, and Shipping Made Simple: This guide will demystify the process of setting up payment gateways, configuring tax settings, and establishing shipping zones and rates.
The Benefits of Using Shopify for Building an Online Store
Shopify stands out as an ideal platform for a diverse range of businesses, from those just starting to established brands looking to scale. Its suitability for new businesses, dropshipping models, and full-scale brands is a testament to its flexibility and comprehensive feature set.
One of Shopify’s most significant advantages is its fully hosted solution. This means you don’t have to worry about the technical complexities of server maintenance, security, or uptime; Shopify handles it all. This ease of use is a cornerstone of the platform, allowing you to focus on what matters most: growing your business. Furthermore, their dedicated support team is available 24/7 to assist with any queries or challenges you might encounter.
The extensive Shopify App Store is another powerful asset. It offers thousands of apps that can extend the functionality of your store, from marketing and sales to inventory management and customer service. This ecosystem allows your store to grow and adapt to your changing needs, ensuring long-term scalability. In essence, Shopify provides the ideal foundation for launching and expanding a thriving online store.
Setting Up Your Shopify Store
Step 1: Sign Up and Start Your Shopify Development Store
Your first step is to visit Shopify.com and sign up for their free trial. As of 2025, Shopify typically offers a 3-day free trial, which then transitions into a promotional offer of $1 per month for the first three months. This gives you ample time to build and test your store before fully committing to a paid plan.
During the sign-up process, you’ll be prompted to provide some basic information about your business. It’s here that you’ll need to understand the distinction between a development store and a live store.
A Shopify development store is a free account for Shopify Partners to build and test stores for clients. It allows for unlimited testing and access to most of the features of the Advanced Shopify plan without a subscription fee. However, you can’t process real transactions through a development store. Once you’re ready to start selling, you’ll need to choose a paid plan and transition to a live store.
For this guide, we’ll proceed with setting up a standard store through the free trial. You’ll need to choose a unique store name, which will initially form your temporary Shopify domain (e.g., yourstorename.myshopify.com). Don’t worry, you can and should add a custom domain later to build a stronger brand identity.
How long does it take to set up a Shopify store?
The timeline for setting up a Shopify store can vary. A basic store with a few products can be set up in as little as 1-3 days. A more customized store with a larger product catalog may take anywhere from 7 to 14 days to fully launch.
Step 2: Choose and Customize Your Shopify Theme
Your store’s theme is its visual foundation. Shopify offers a variety of both free and premium themes in the Shopify Theme Store. Free themes like Dawn, Spotlight, and Sense are excellent starting points, offering clean designs and robust features.
To install a theme:
- Navigate to Online Store > Themes in your Shopify admin.
- Click “Visit Theme Store” to browse the available options.
- Once you find a theme you like, you can preview it and then add it to your theme library.
After installing your theme, it’s time to customize it. Shopify’s theme editor utilizes a user-friendly drag-and-drop interface, making it easy to modify your homepage layout, upload your logo, and select your brand’s colors and fonts.
Step 3: Connect Your Pages with Shopify
Every online store needs a set of essential pages to build trust and provide important information to customers. The key pages to create include:
- Home: Your digital storefront.
- About Us: Tell your brand’s story.
- Shop: The gateway to your products.
- Contact Us: Make it easy for customers to get in touch.
- FAQs: Proactively answer common questions.
- Privacy Policy & Terms of Service: These are crucial for legal compliance. Shopify even provides templates for these that you can customize.
You can create these pages under Online Store > Pages in your Shopify admin. Once created, you’ll need to link them in your store’s navigation menus (header and footer) under Online Store > Navigation. For more advanced page layouts, you can use Shopify’s built-in page builder or explore apps from the Shopify App Store that offer more design flexibility. Be sure to include trust badges, clear calls-to-action (CTAs), and compelling content on these pages.
Step 4: Complete the Shopify Setup Wizard
Shopify provides a helpful setup wizard to guide you through the initial configuration of your store. This wizard will prompt you to:
- Add your store’s address and other business details.
- Set your preferred currency, location, and time zone.
- Configure your email and customer notification settings.
Taking the time to complete these settings accurately from the start will ensure a smoother operation down the line.
Step 5: Create Your Shopify Store Categories (Collections) and Products
With the basic framework of your store in place, it’s time to add your products. In Shopify, products are organized into collections, which are essentially product categories. You can create collections like “Men,” “Women,” “Accessories,” or any other grouping that makes sense for your inventory.
Shopify offers two types of collections:
- Manual Collections: You manually add specific products to these collections. This gives you precise control and is ideal for small, curated collections or special promotions.
- Automated Collections: Products are automatically added to these collections based on conditions you set, such as product tags, price, or title. This is a huge time-saver for stores with large inventories.
To create a collection, go to Products > Collections. To add a new product, navigate to Products > Add product. For each product, you’ll need to provide:
- Product Title and Description: Make these engaging and informative.
- Images: High-quality product images are essential for driving sales.
- Pricing: Set your price and, if applicable, a “compare at” price to show a discount.
- SKU (Stock Keeping Unit): A unique identifier for each product.
- Inventory: Track the quantity of each product you have in stock.
For SEO best practices, be sure to write compelling meta descriptions, use relevant tags, and add descriptive ALT text to your images.
Step 6: Understand the Different Product Types in Shopify
Shopify is a versatile platform that supports various product types:
- Physical products: These are tangible items that you ship to customers. This is the most common product type.
- Digital products: These include downloadable files like ebooks, music, or digital art. Apps like “Digital Downloads” can help manage the delivery of these files.
- Services: You can sell services such as consultations, workshops, or appointments.
- Subscription-based products: With the help of subscription apps, you can offer products on a recurring basis, creating a predictable revenue stream.
- Gift cards: Shopify has a built-in gift card feature, allowing customers to purchase store credit for others.
Understanding these different product types will allow you to diversify your offerings and cater to a wider range of customer needs.
Step 7: Customize Your Online Store
Now, let’s delve deeper into customizing the look and feel of your store to create a unique and on-brand experience for your customers.
Customize Your Global Fonts and Colors
To maintain a consistent brand identity, you can set your global fonts and colors in the theme settings. Navigate to Online Store > Themes > Customize > Theme Settings. Here, you can select typography and color schemes that align with your brand’s style guide.
Accessing Shopify Templates
Within the theme customizer, you have access to various templates for different parts of your store, such as the header, footer, product pages, and collection pages. You can customize the layout of these sections using Shopify’s drag-and-drop editor, adding elements like videos, banners, featured collections, and blog posts to create a rich and engaging user experience.
Customize Your Shopify Header
The header is one of the first things visitors see. You should customize it to include:
- Your logo.
- The main menu navigation.
- A cart icon.
- A search bar.
Many themes also offer the option of a sticky header, which remains visible as the user scrolls down the page, improving user experience. You can also add an announcement bar at the very top to promote discounts, free shipping, or other important news.
Customize Your Shopify Checkout Page
While full customization of the checkout process is reserved for Shopify Plus subscribers, you can still modify the look and feel of your checkout page on standard plans. In your theme settings, you can add your logo, and change the colors of the background, buttons, and text to match your brand. You should also enable express checkout options like PayPal, Apple Pay, and Google Pay to provide a faster and more convenient payment experience for your customers.
Customize Your Shopify Shop Page
Your shop or collection pages are where customers browse your products. To improve the user experience on these pages, you can:
- Choose between a grid or list view for your product layout.
- Add filters and sorting options to help customers find what they’re looking for (e.g., filter by size, color, or price).
- Feature specific collections or products.
- Enable features like product quick view and hover zoom on product images.
Step 8: Setting Up Payment, Tax, and Shipping
These final setup steps are crucial for the operational side of your business.
Setting up Payment Information
To accept payments from customers, you need to set up a payment gateway. Shopify Payments is Shopify’s own payment processor, which is highly recommended as it integrates seamlessly with your store and often offers competitive transaction fees. You can also integrate with other popular gateways like Stripe and PayPal.
To set up Shopify Payments, go to Settings > Payments and complete the account setup. This will involve providing your business and banking information. It’s also a good practice to enable multi-currency selling if you plan to cater to an international audience. Before you launch, be sure to make a test purchase to ensure the payment process is working smoothly.
Setting up Tax Information
Tax compliance is a critical aspect of running an online business. Shopify helps simplify this by automatically calculating taxes based on your location and the customer’s location. You can configure your tax settings under Settings > Taxes and Duties. You’ll need to specify the regions where you have a tax liability. If you are required to charge Goods and Services Tax (GST) or Value Added Tax (VAT), you will need to enter your registration number. Shopify also allows for tax overrides for specific products or locations if needed.
Setting up Shipping Information
The final piece of the puzzle is setting up your shipping. Under Settings > Shipping and delivery, you can create shipping zones for the different regions you ship to. For each zone, you can set up different shipping rates, such as:
- Flat-rate shipping: A fixed shipping cost for all orders within a zone.
- Free shipping: Often used as a marketing incentive, for example, for orders over a certain value.
- Real-time calculated rates: Shipping costs are calculated at checkout based on the carrier’s rates and the weight and dimensions of the order.
You can also set up local delivery and in-store pickup options if you have a physical presence. Integrating with shipping apps can further streamline your fulfillment process by allowing you to print shipping labels and track orders directly from your Shopify admin.
Ready to Build Your Online Store with Silver WebBuzz?
While this guide provides a comprehensive overview of setting up a Shopify store, sometimes you need an expert touch to truly make your brand shine. Silver WebBuzz is a trusted Shopify Store development Company with a proven track record of creating successful e-commerce stores.
The team at Silver Webbuzz is praised for their technical knowledge, development experience, and client-centric approach. They can help you navigate the complexities of Shopify setup, from theme customization to app integration, ensuring your store is not only visually appealing but also optimized for conversions.
Final Thoughts
Setting up a Shopify store from scratch in 2025 is an achievable goal for any aspiring entrepreneur. By following the steps outlined in this guide, you can build a solid foundation for a successful online business. From the initial idea to the final launch, Shopify provides all the tools you need to create a beautiful and functional e-commerce store.
Use this guide as your checklist, and don’t hesitate to explore the vast resources available within the Shopify ecosystem.
Ready to get started, but want a professional to handle the heavy lifting? Let Silver WebBuzz handle your store setup while you focus on sales!